

How To Make A Video Black And White
Allow's look at the quickest and easiest style to style your footage in black and white using Premiere Pro.
Start nosotros'll walk through the most basic and simple mode to practise this right inside the plan.
Side by side we'll explore some more artistic ways to mode your flick using blackness and white editing techniques.
Pace one: Import Footage and Identify Clips Into Timeline
I ever add color correction and video effects as one of the last steps in my editing process. This helps eliminate whatever unnecessary fourth dimension spent editing clips that I won't really use in the end.
For this reason, it's a good idea to already have at to the lowest degree a base of operations edit in place before you showtime calculation color furnishings.
Go ahead and drag your clips into the editing timeline and edit them to the timing and social club that you lot prefer.
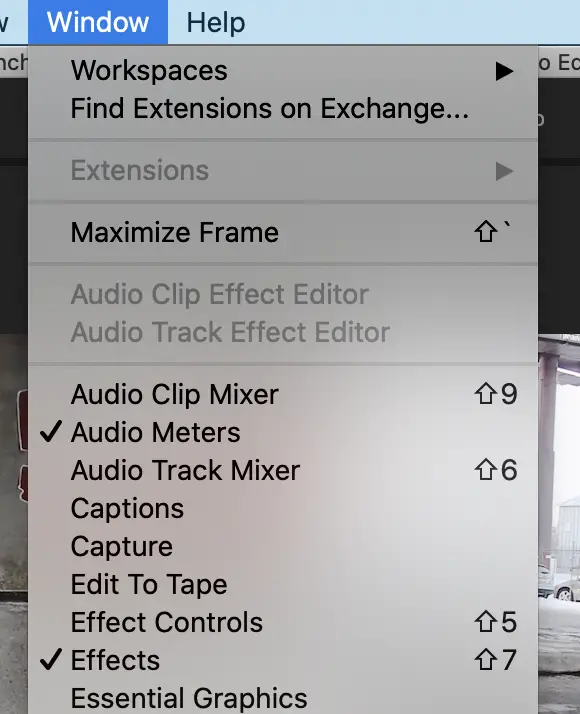
Earlier nosotros add our blackness and white effect, you need to know where to find it starting time. If you don't already meet your furnishings panel bachelor, navigate up to Window -> Furnishings to make sure it opens.
Step iii: Elevate Black and White Effect to Your Clip
Once inside your effects console, open the folder called Video Effects -> Epitome Control -> Blackness and White.
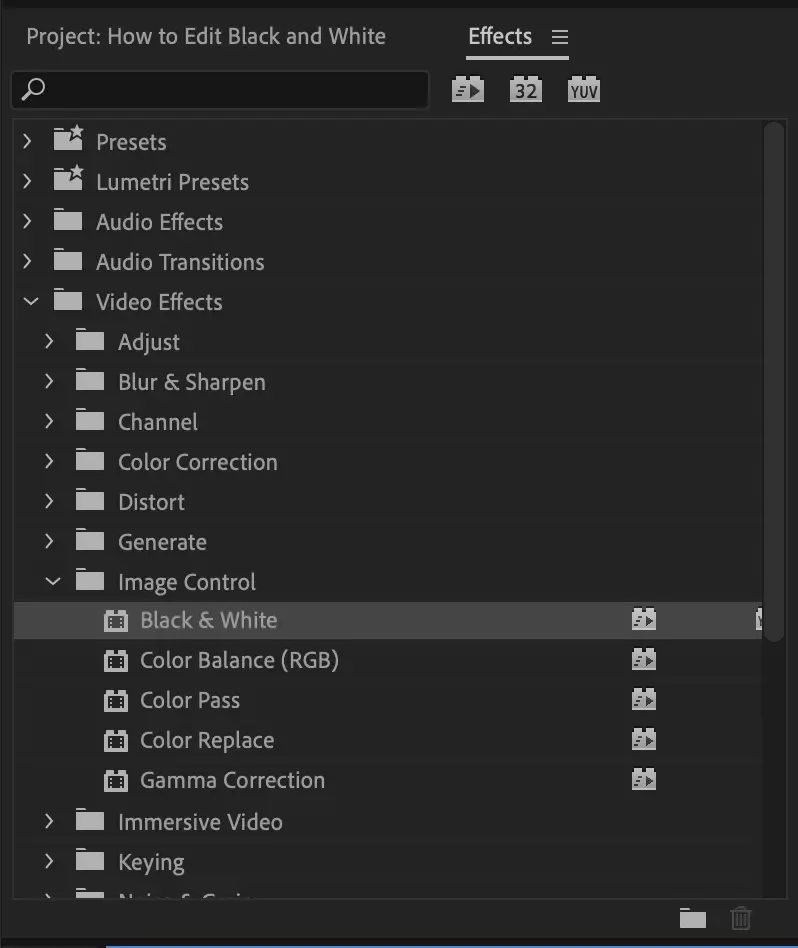
Drag this event straight onto the prune that you'd like to transform into black and white.
You tin can also simply double click on the issue itself and it will be practical to any and all video clips that are currently selected.
If yous're happy with the mode information technology looks, you tin can stop right there. That's all there is to it.
However, there is and so much more you can do to style your black and white clips. Keep reading for some farther tips.
Tip i: How to Add Blackness and White Effects to Multiple Clips at Once
In well-nigh cases, you'll desire to apply this clip to more than than only i clip. There are a few ways to make this procedure very quick and easy.
i | Simply highlight or selected all the clips that you'd like to change to blackness and white and either drag the result on height of them or double click the effect.
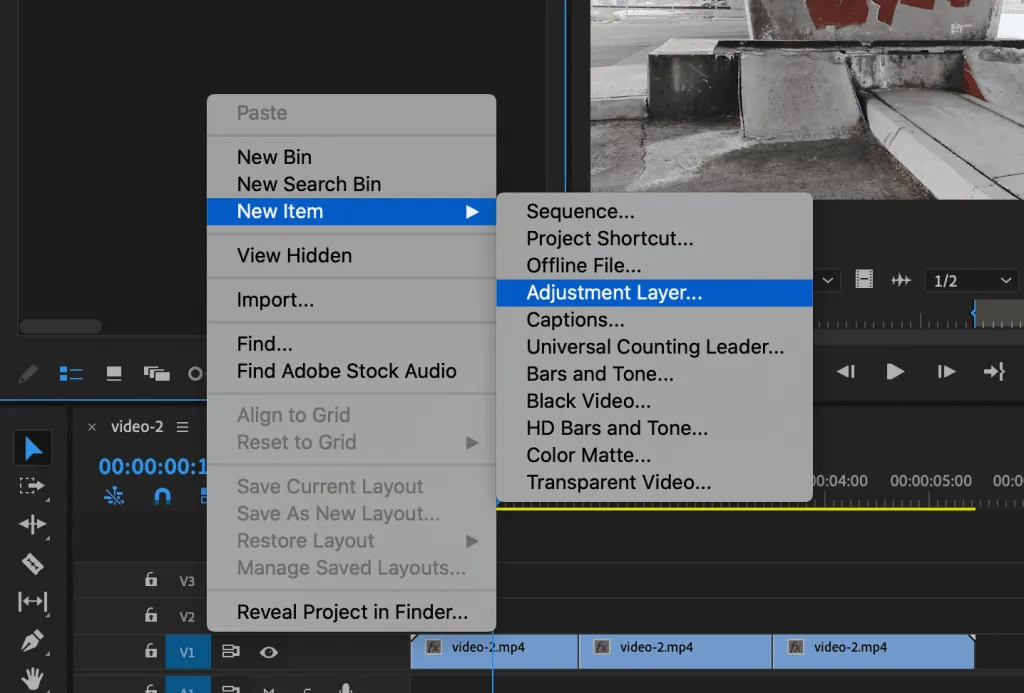
2 | Create an adjustment layer on the layer above your electric current video clips and apply the same affect to the aligning layer by dragging the upshot onto the adjustment layer or by double-clicking on the effect while the aligning layer is selected.
Keep in listen that an adjustment layer acts similar a piece of drinking glass. If you utilize a filter on acme of it, that filter volition affect any layer that is underneath the adjustment layer.
For a more in-depth caption of how adjustment layers work, check out this post all about it. Adjustment layers are really quite simple to utilize and can be super helpful in complicated edits.
Pro Tip: If you decide to make any changes to your black and white outcome, it volition be very helpful to employ the adjustment layer method. This volition let any changes that you make to apply to ALL clips underneath that aligning layer at once, instead of having to get through each prune 1 by ane to make tweaks.
Tip two: Quick Means to Style Your Black and White Footage
Once you lot've applied the bones black and white effect, your footage may still demand a piddling styling to make it look only right. Here are a few quick adjustments to requite it an extra boost.
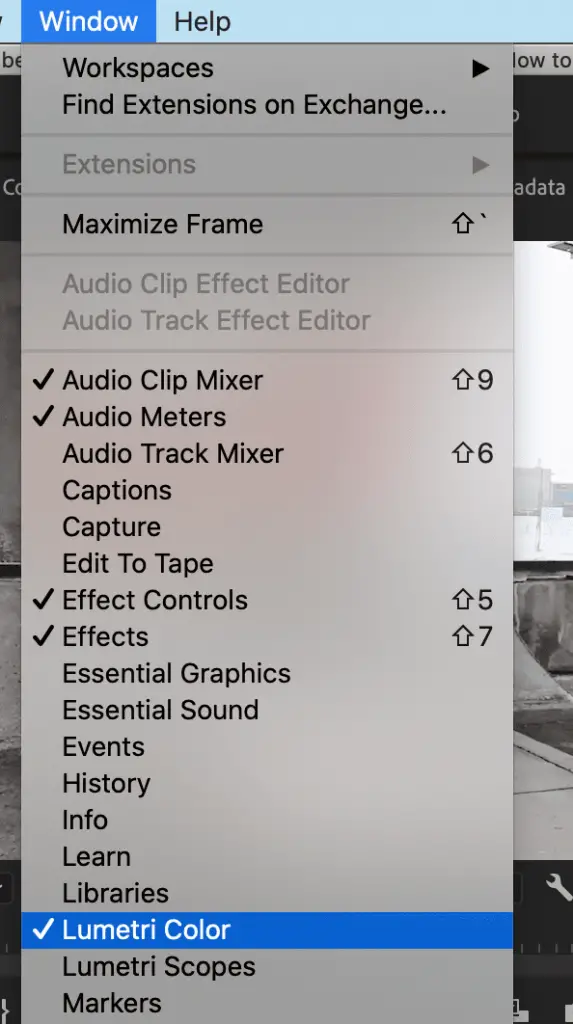
First, make certain that your Lumetri Colour window is open. To practise this navigate upwards to Window and ensure that it is checked.
1 | Set Exposure
Earlier yous make any further adjustments, y'all need to commencement brand sure that your exposure is set correctly.
I'll never forget my college picture professor who ever told united states when exposing our black and white film in the dark room – make sure you tin see pure blacks, pure whites, and everything in betwixt.
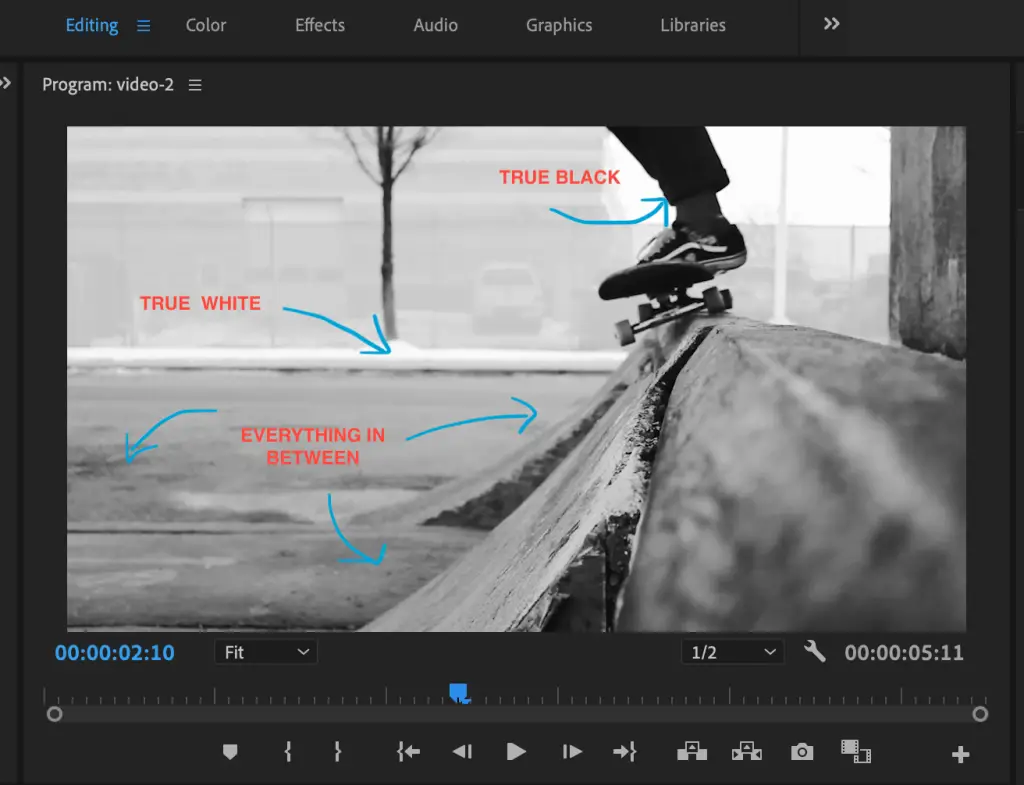
Non every shot will be perfect, simply this guideline has always stuck with me. When exposing your shot, expose it in such a way that y'all tin see blacks, whites, and everything in between.
To adjust exposure, but drag the exposure control bar under the Bones Correction tab in Lumetri Color.

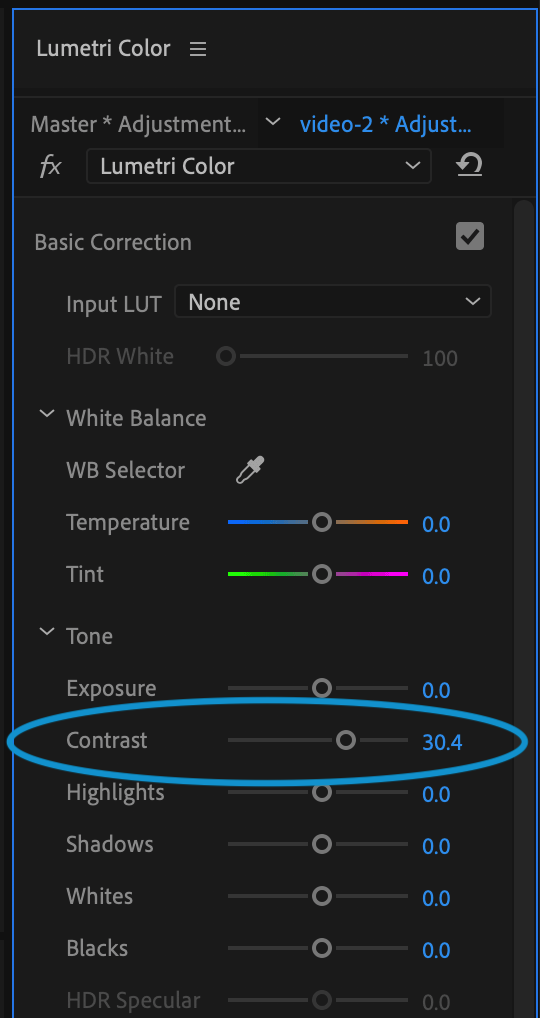
2 | Add Contrast
In merely about every case, yous will want to adjust the contrast of your clip. This simply means making the dark areas more blackness and the light areas more than white.
Simply drag the contrast controller under the Basic Correction tab in the Lumetri Color window. The amount will depend on your clip and your preferences. I set mine around thirty in this example.
3 | Cull Your Style
Now that nosotros've covered the near traditional, Ansel Adams sort of styling for black and white footage, let'south talk nearly a newer tendency – the movie fade.
Y'all may like the look of a more than muted, greyness tone to your footage as seen beneath. That's perfectly fine. In that location are technically no rights and wrongs here. That'southward why moving-picture show is an art.
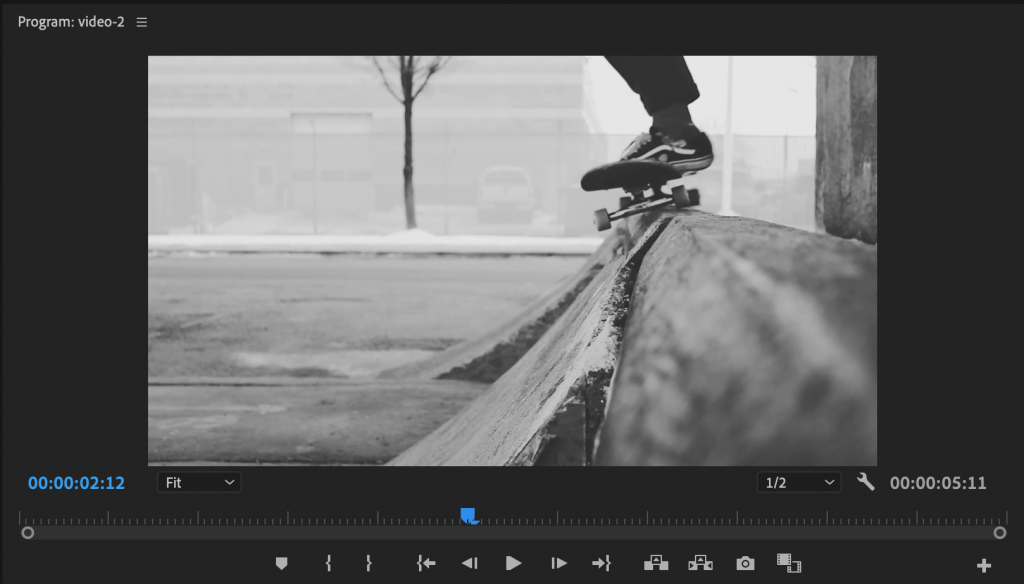
You are the artist and information technology's totally upwards to your preference. If y'all want to reach this more matte look, and so follow these steps.
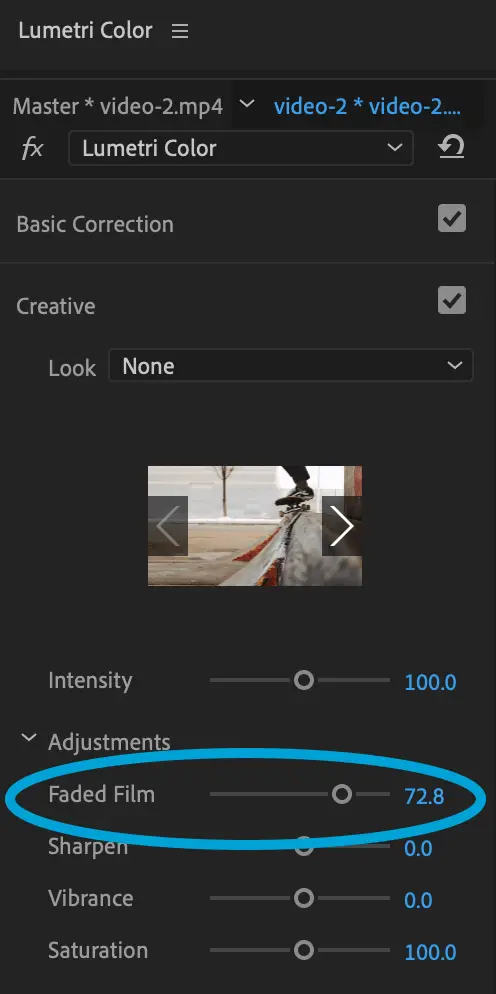
Method ane: The quick and easy style to achieve this effect is to navigate to the Artistic tab inside the Lumetri colour window, next simply slide the Faded Film adjustment level to where you're happy with the desired look.
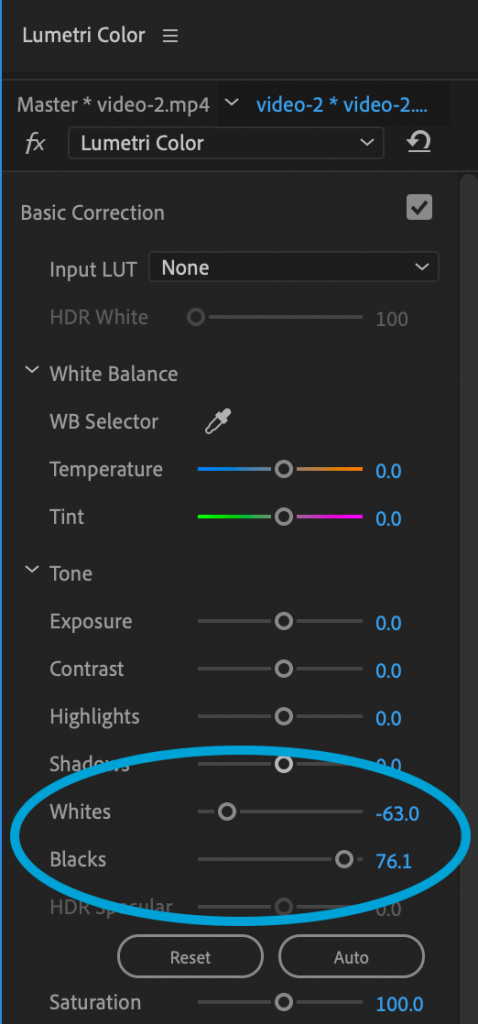
Method ii: If you want to accept a picayune more than control over your image, you can simply adjust the white and black levels individually. To achieve this same look, bring your whites DOWN and your blacks UP. These levels can be adjusted in the Lumetri colour window, under the Basic Correction tab.
iv | Explore Professional Presets or LUTs
The final tip I'll give is to explore some of the incredible work out in that location already done by other talented artists.
If you aren't familiar with presets or LUTs, they are just settings that other artists take already created that you can apply to your own footage to easily achieve a similar look and style.
There is admittedly no shame in having a few of these on hand. I have many and use them often to save time and to make my footage look fifty-fifty more cinematic.
Hither are a few of my favorite black and white footage LUTs you may want to explore.
- LUTs Color Presets Pack | Cinematic Looks – Premiere Pro
- Cinepack – LUT Color Correction Presets

Terminal Thoughts
I promise y'all've seen how like shooting fish in a barrel it is to manner your footage in black and white using Premiere Pro. For more tips and tutorials, exist sure to bank check out more of my Premiere Pro Tutorials here.
If y'all have any questions, but leave them for me in the comments below. Thanks!
-Beth
Share on Pinterest:
Source: https://www.handcraftfilms.com/blog/premiere-pro-black-and-white/
Posted by: martincouseed1937.blogspot.com
0 Response to "How To Make A Video Black And White"
Post a Comment